How to Create epic 3D Flyover Videos for Hiking/Trailing/Sealing/Cycling
Introduction
Hiking is an enjoyable activity, from the preparation and planning stage to the hike itself. But the experience usually doesn’t end when you return home. Reviewing photos and videos is a common way to relive the journey, but another exciting method is visualizing your completed route.
How your journey is displayed on a map can make a huge difference! A simple track on a static map cannot compare to a dynamic 3D visualization with a camera “following” you in the air. Especially if the area was not that flat. Almost every time I create such a 3D video, I gain a fresh perspective and a better overview of the hike.
The same is relevant for biking, trails, and even sailing!
In this article, I’ll share three free tools I’ve used to create these visualizations:
- Relive (a mobile app) – yes, literally relive
- Rumbo.world (web tool)
- Mapdirector (web tool)
Preparing Your GPX File
To generate a 3D visualization, you’ll need a GPX file containing your hike’s recorded path. If you use a Galaxy Watch or track your hike with the Samsung Health app – you can export a GPX file directly from the Samsung phone.
If you use a Garmin watch, you need to open the Garmin Connect web (can be done on a mobile phone as well), because the Garmin Connect mobile app cannot export tracked activity to a GPX file. This is rather strange, since Garmin is more sport-focused, but anyway.
Other trackers and fitness apps usually have one or another way to export a GPX file.
I prefer Komoot for hiking over Garmin, as it is independent of specific devices. Regardless of the watch or app I use, all hikes I want to keep are eventually stored in my Komoot account.
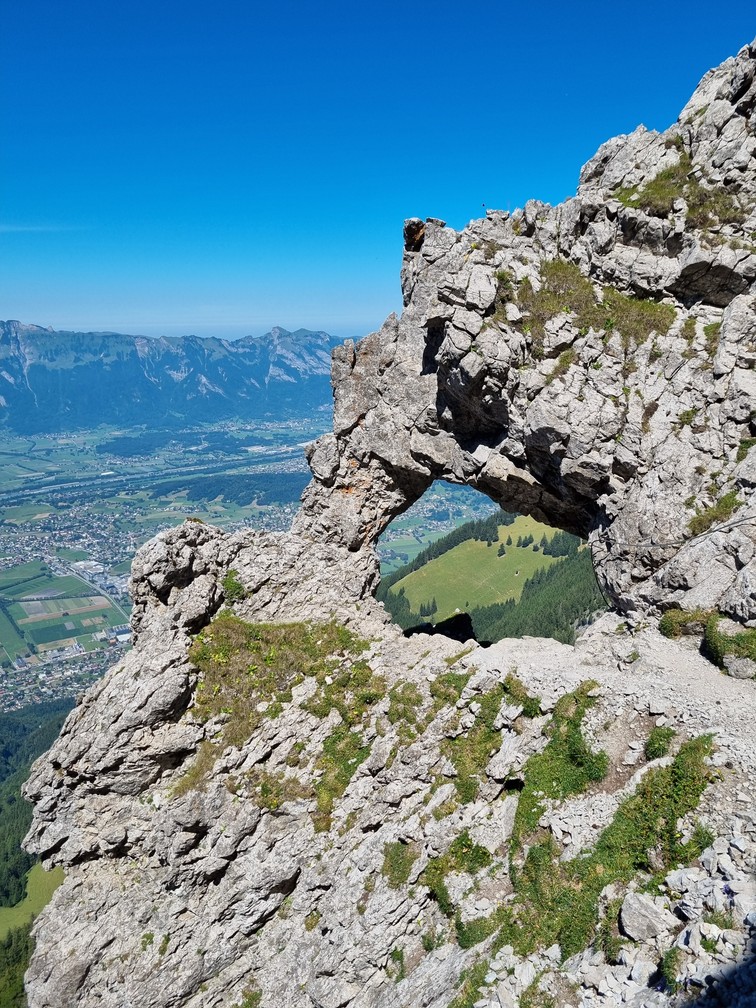
For this article, I will use a track of a hike to the peak of the mountain Schesaplana I did with my family in the Alps a few years ago.
Here’s a screenshot from Komoot:
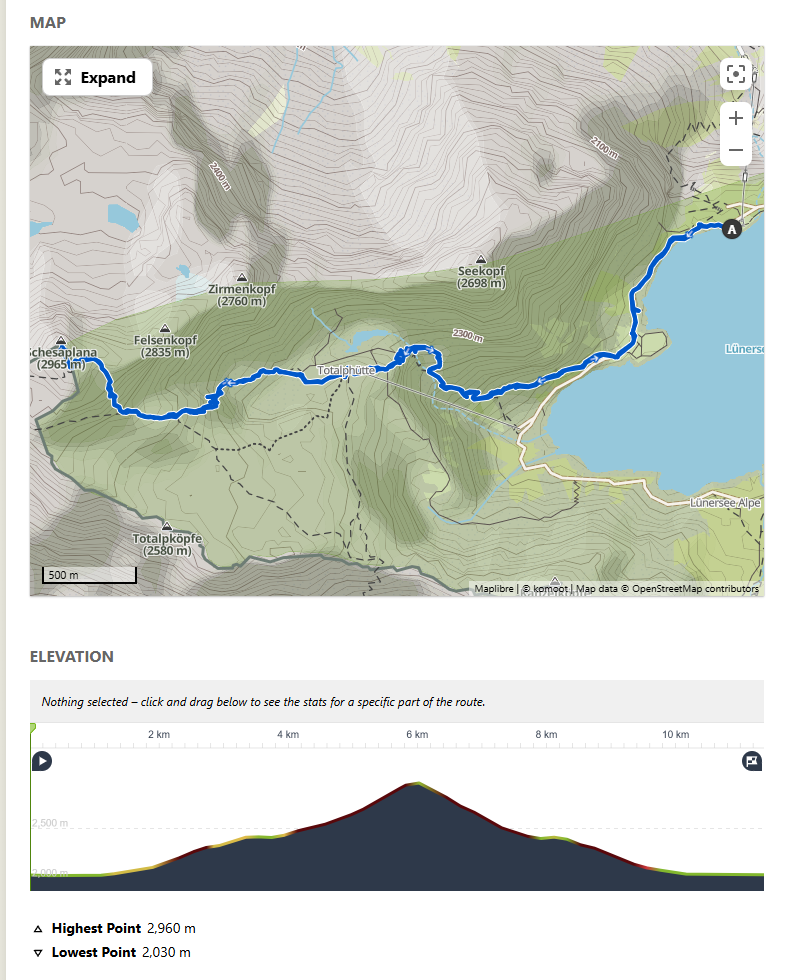
Click “Download GPX file,” and we’re ready to generate a 3D visualization.
Relive
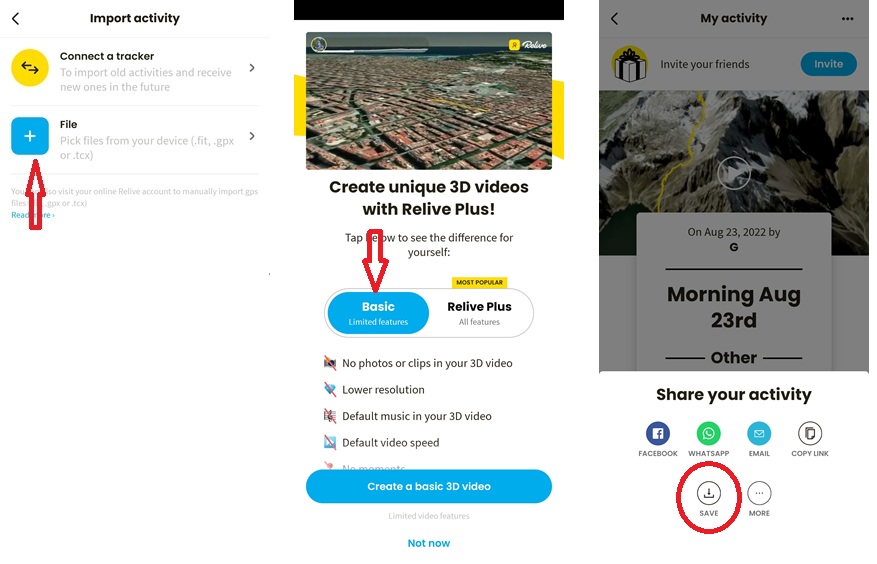
Relive is primarily a social platform for outdoor activities and therefore requires an account, but it also offers a one-click 3D video generation feature, and I use it for this purpose only.
The benefits of relives are:
- it is very simple to use: upload the GPX file, tap “Create a video,” and it’s done.
- video is generated pretty fast
- video is smooth, and camera trajectory is usually good
- video includes elevation profile, time, and distance
The disadvantages are:
- Video duration is limited to 30 seconds
- Video is stored on the Relive website (privacy concern for some)
- Video resolution is really very low
Here’s the generated video:
Rumbo.world
Rumbo is a single-map project located on https://www.rumbo.world/home and according to its own description, it “transforms GPS trails into video recaps”. Rumbo web page has another very valuable remark: “No app, no cookies, no account, no ads, no credit card.” This is great!
It has free and premium options. The premium one offers:
- HD resolutions (1080p Horizontal 1920×1080, Vertical 1080×1920, Square 1080×1080)
- Longer videos (up to 2 minutes)
- Custom interface language (Deutsch, English, Español, Français or Request a language)
- Extra base maps (Ocean, Winter, etc)
- Custom color for the trail animation
- Edit the waypoint texts (e.g., “Start” and “End”)
- The great feeling of supporting an independent programmer
Obviously, the free version does not allow you to do all that. As with other tools mentioned in this article, I stay with a free option, and try to stay as close to default settings as possible.
Creating a Video with Rumbo:
- Upload the GPX file
- Choose from several map styles
- Adjust settings such as duration, speed, zoom, and camera angle
- Request a video
The default settings were kind of …. boring. So I adjusted the camera to “from behind”. After submission, Rumbo required an email address to notify when the video was ready.
Downsides:
- Fixed yellow trail color (bad for snowy locations)
- Long generation time – took about an hour (yes, an hour)
- Requires an email to download
- it looks like generated videos are available for everyone who knows (or can guess/bruteforce) the URL
Here are the results:
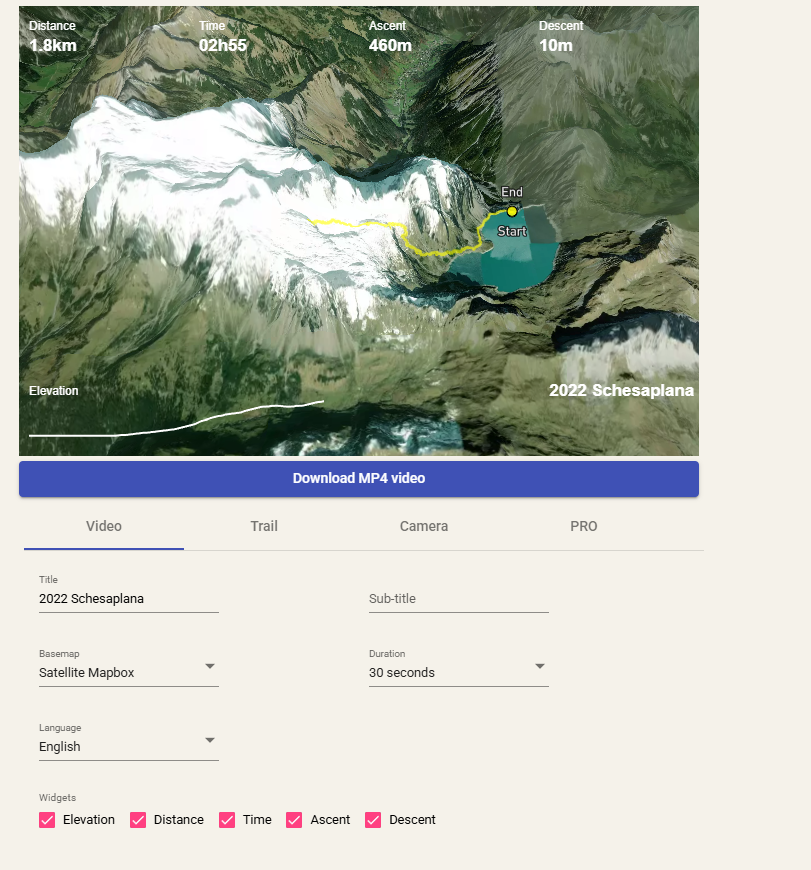
Mapdirector
Since I wrote this post, MapDirector got huge enhancements. It can show different types of overlays and many many other features.
Just check it yourself!
Mapdirector (https://mapdirector.com/) is another (relatively new) free web tool for 3D route visualizations. Unlike Rumbo, it has no premium option, it is just free. But you can donate to support the developers. Mapdirector describes itself as “Turn your GPS tracks into breathtaking cinematic flyovers. Relive your journeys, inspire others, or prepare for your next big race.”
Features & Settings:
- Full control over camera angles, zoom, flight paths, and even fog effect(!)
- Dynamic path colors based on selected parameters (like speed or elevation)
- Can generate long videos (up to 600 seconds)
- Client-side rendering (took a minute or so on my not very fast laptop)
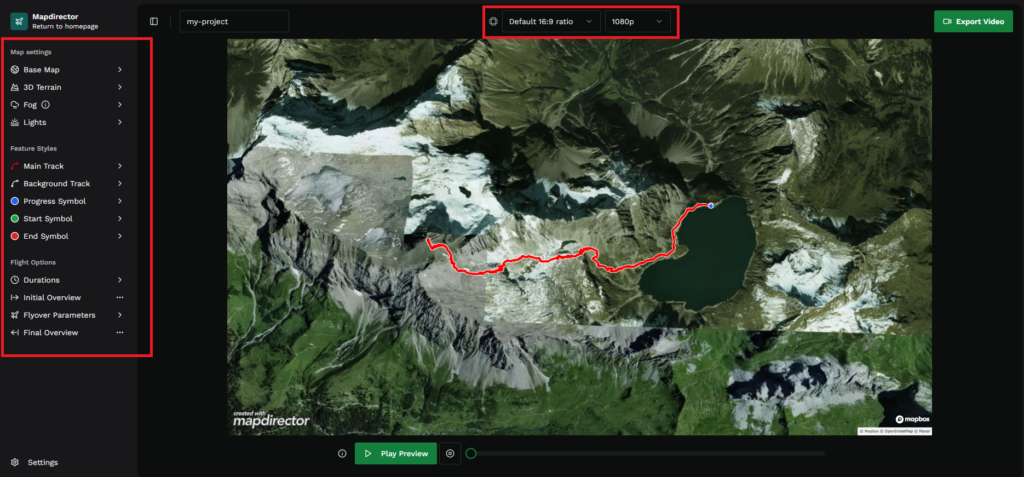
I used default settings for my test. The result was solid:
- The camera angle and movement were well-adjusted.
- A dot showing the current location was a useful addition.
Downsides:
- Missing
elevation profile(added), time, and distance data - Requirement to stay in the browser during video generation
And here is the video
Conclusion
- Relive creates smooth but (very) low-resolution videos, is mobile friendly, requires an account, and hosts the video online,.
- Rumbo.world offers some customization, but is slow, requires email, and uses an unchangeable yellow path.
- Mapdirector is my top choice, as it’s free, highly customizable, and produces very solid results even with mostly default settings.
If you plan to use Mapdirector, consider donating to support their work (I’m not affiliated in any way).
Final Tip
A circular route makes for a more engaging visualization than a simple out-and-back track. Something to keep in mind when planning your next hike!
PS: I heard that Garmin has an app called “Garmin Sports” for this, but it’s not available on any of my Android devices. If you’ve tried it, let me know your thoughts!